How to Automate Opening and Positioning Multiple Apps on Mac
Here’s a simple app I recently created for a friend who needed to regularly open multiple instances of the same app and position them for easy viewing. While doing this manually isn’t difficult, it can become tedious when you have to repeat the process daily.
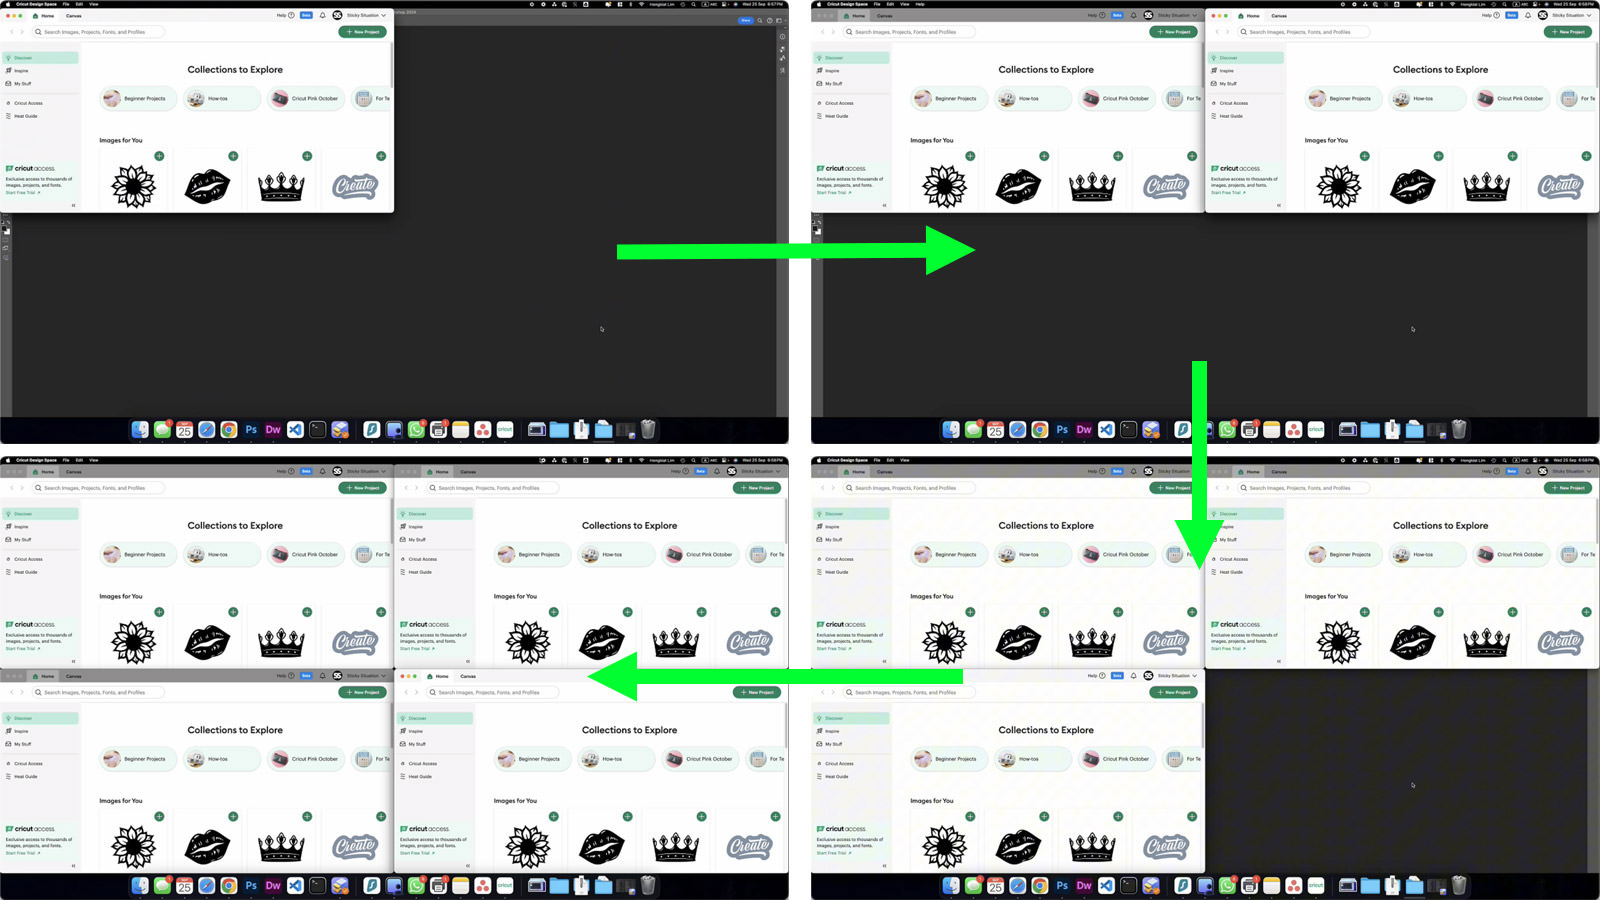
This app automates the task, positioning the app exactly where I want them to be every time it’s executed.
Watch the video below (sped up 5x) to see exactly how the app works when executed.
If you’d like to create a similar setup – whether it’s for opening multiple instances of the same app or a combination of different apps – this article will guide you through the process. I’ll provide the AppleScript used and explain how to customize it to suit your needs, so you can open and arrange apps automatically.
Prerequisites/Requirements
Here’s everything you’ll need to make this work:
The Apps
- Automator – This built-in macOS app allows you to create custom workflows and turn them into executable apps.
- Magnet – This app lets you arrange open windows on your Mac desktop into different positions and sizes using keyboard shortcuts.
- Code Editor – A code editor is required to edit the AppleScript that will be added to the Automator app later. If you don’t have a code editor installed, the Notes app will work too.
AppleScript
Here’s the full version of the AppleScript I used, which I’ll explain in detail later.
tell application "Cricut Design Space" to activate
delay 15 -- Wait 15 seconds for the app to fully launch

tell application "System Events"
    -- Step 2: Simulate Control + Option + U
    key code 32 using {control down, option down} -- U key has key code 32
    delay 5 -- Short delay after keypress

    -- Step 3: Open first new window via File > New Window
    tell process "Cricut Design Space"
        click menu item "New Window" of menu "File" of menu bar 1
    end tell
    delay 5 -- Wait 2 seconds for the new window to open

    -- Step 4: Simulate Control + Option + I
    key code 34 using {control down, option down} -- I key has key code 34
    delay 5 -- Short delay after keypress

    -- Step 5: Open second new window via File > New Window
    tell process "Cricut Design Space"
        click menu item "New Window" of menu "File" of menu bar 1
    end tell
    delay 5 -- Wait 2 seconds for the new window to open

    -- Step 6: Simulate Control + Option + J
    key code 38 using {control down, option down} -- J key has key code 38
    delay 5 -- Short delay after keypress

    -- Step 7: Open third new window via File > New Window
    tell process "Cricut Design Space"
        click menu item "New Window" of menu "File" of menu bar 1
    end tell
    delay 5 -- Wait 2 seconds for the new window to open

    -- Step 8: Simulate Control + Option + K
    key code 40 using {control down, option down} -- K key has key code 40
end tell
1. Launch Automator App
Launch the Automator app, choose “Application,” and click “Choose.”
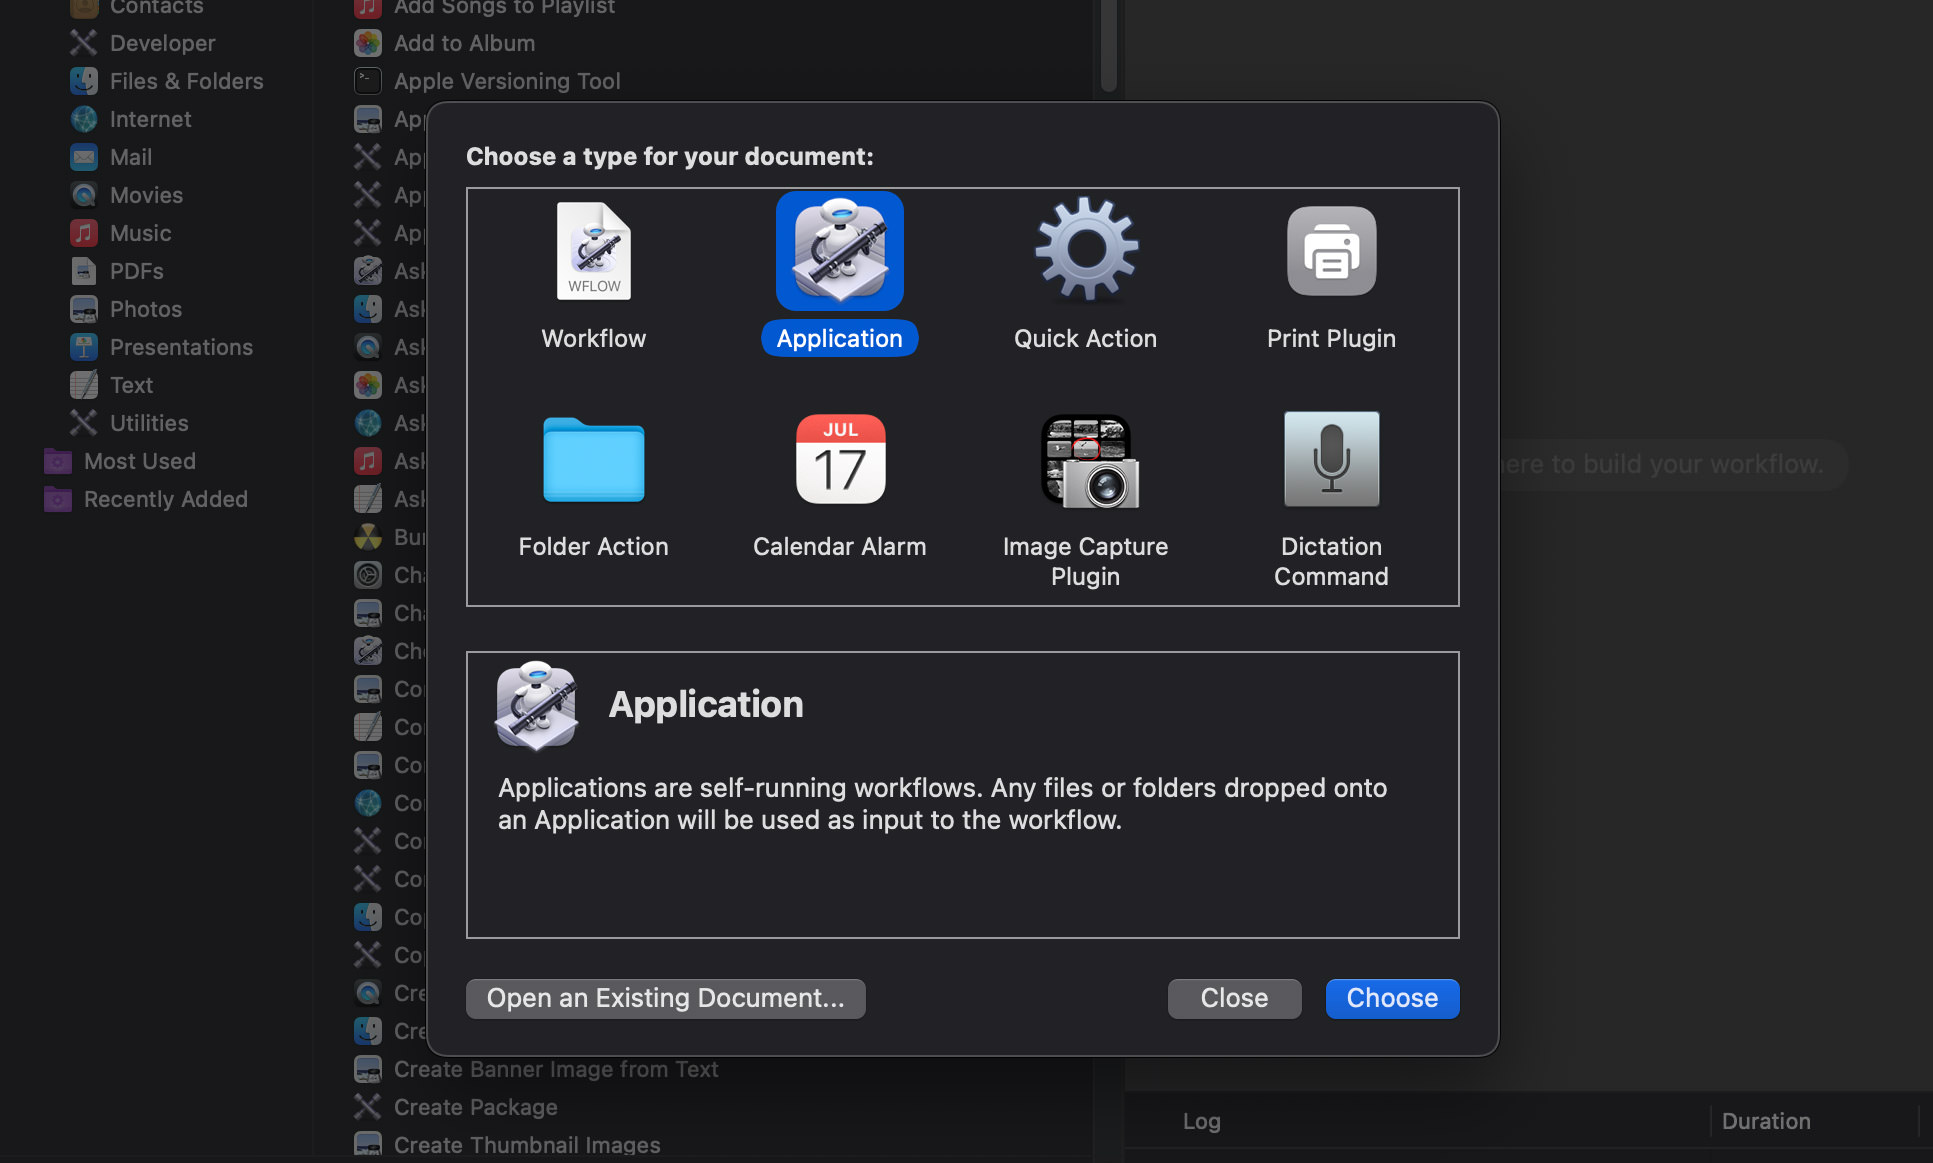
Under the Actions tab, search for “Run AppleScript,” then select it and drag it over to the right panel.

2. Edit AppleScript
Now, referring to the AppleScript provided above, you’ll need to edit it to fit your requirements.
Let me break down what you need to modify, with explanations along the way. The codes highlighted in bold are the ones you need to edit to fit your requirements.
Step 1
tell application "Cricut Design Space" to activate
delay 15 -- Wait 15 seconds for the app to fully launch
First, replace Cricut Design Space with the name of the app you want to use.
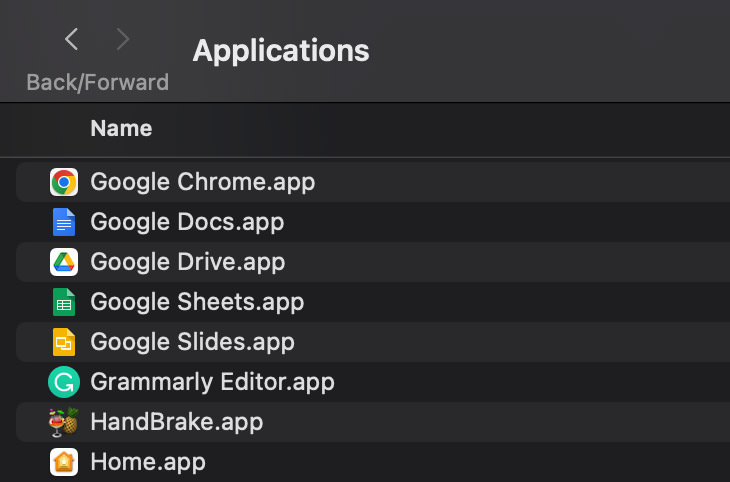
How do you find the exact name of your app? Simple. Go to the Applications/ folder, copy the app name (without the .app extension), and replace the one in the script.
The delay 15 means the script will wait 15 seconds to allow the app to fully load. You can reduce this if your app is lighter and loads faster (e.g., Google Chrome, Safari), or increase it for heavier apps (e.g., Adobe Photoshop, Adobe Premiere).
So far, we’ve instructed the script to launch the app we want and added a 15-second delay to ensure it has enough time to fully load before executing the rest of the commands.
Next, the remaining actions are marked with step numbers, and they are enclosed within:
tell application "System Events"
and
end tell
Here’s an explanation of what each step does, along with the parts you need to edit (in bold) to fit your needs.
Note: Refer to the table at the end of the page for a full list of AppleScript key codes.
Step 2
    -- Step 2: Simulate Control + Option + U
    key code 32 using {control down, option down} -- U key has key code 32
    delay 2 -- Short delay after keypress
Simulates the keystroke Control + Option + U, using the Magnet app to position the first opened app at the top-right corner of the screen.
Step 3
    -- Step 3: Open first new window via File > New Window
    tell process "Cricut Design Space"
        click menu item "New Window" of menu "File" of menu bar 1
    end tell
    delay 2 -- Wait 2 seconds for the new window to open
Simulates clicking on the app’s navigation menu “File” > “New Window” to open a second copy of the app, then waits 2 seconds for it to load.
Step 4
    -- Step 4: Simulate Control + Option + I
    key code 34 using {control down, option down} -- I key has key code 34
    delay 2 -- Short delay after keypress
Simulates the keystroke Control + Option + I to position the second opened app at the top-left of the screen, then waits 2 seconds to ensure the action is fully executed.
Step 5
    -- Step 5: Open second new window via File > New Window
    tell process "Cricut Design Space"
        click menu item "New Window" of menu "File" of menu bar 1
    end tell
    delay 2 -- Wait 2 seconds for the new window to open
Simulates clicking on the app’s navigation menu “File” > “New Window” to open a third copy of the app, then waits 2 seconds for it to load.
Step 6
    -- Step 6: Simulate Control + Option + J
    key code 38 using {control down, option down} -- J key has key code 38
    delay 5 -- Short delay after keypress
Simulates the keystroke Control + Option + J to position the third opened app at the bottom-left of the screen, then waits 5 seconds for the action to be fully executed.
Step 7
    -- Step 7: Open third new window via File > New Window
    tell process "Cricut Design Space"
        click menu item "New Window" of menu "File" of menu bar 1
    end tell
    delay 2 -- Wait 2 seconds for the new window to open
Simulates clicking on the app’s navigation menu “File” > “New Window” to open a fourth and final copy of the app, then waits 2 seconds for it to load.
Step 8
    -- Step 8: Simulate Control + Option + K
    key code 40 using {control down, option down} -- K key has key code 40
Simulates the keystroke Control + Option + K to position the fourth opened app at the bottom-right of the screen.
3. Replace Script, Test Script
With your edited version of the script, paste it inside the “Run AppleScript” action, replacing the existing one. Click the Run button directly on top or the Run button in the top-right corner of the screen to test if it works. If it doesn’t, debug the script and test it again.

Once it runs successfully as expected, go to the top menu bar and click File > Save. Make sure the File Format is set to “Application” so it’s saved as an executable program.
4. Edit Privacy & Security Settings
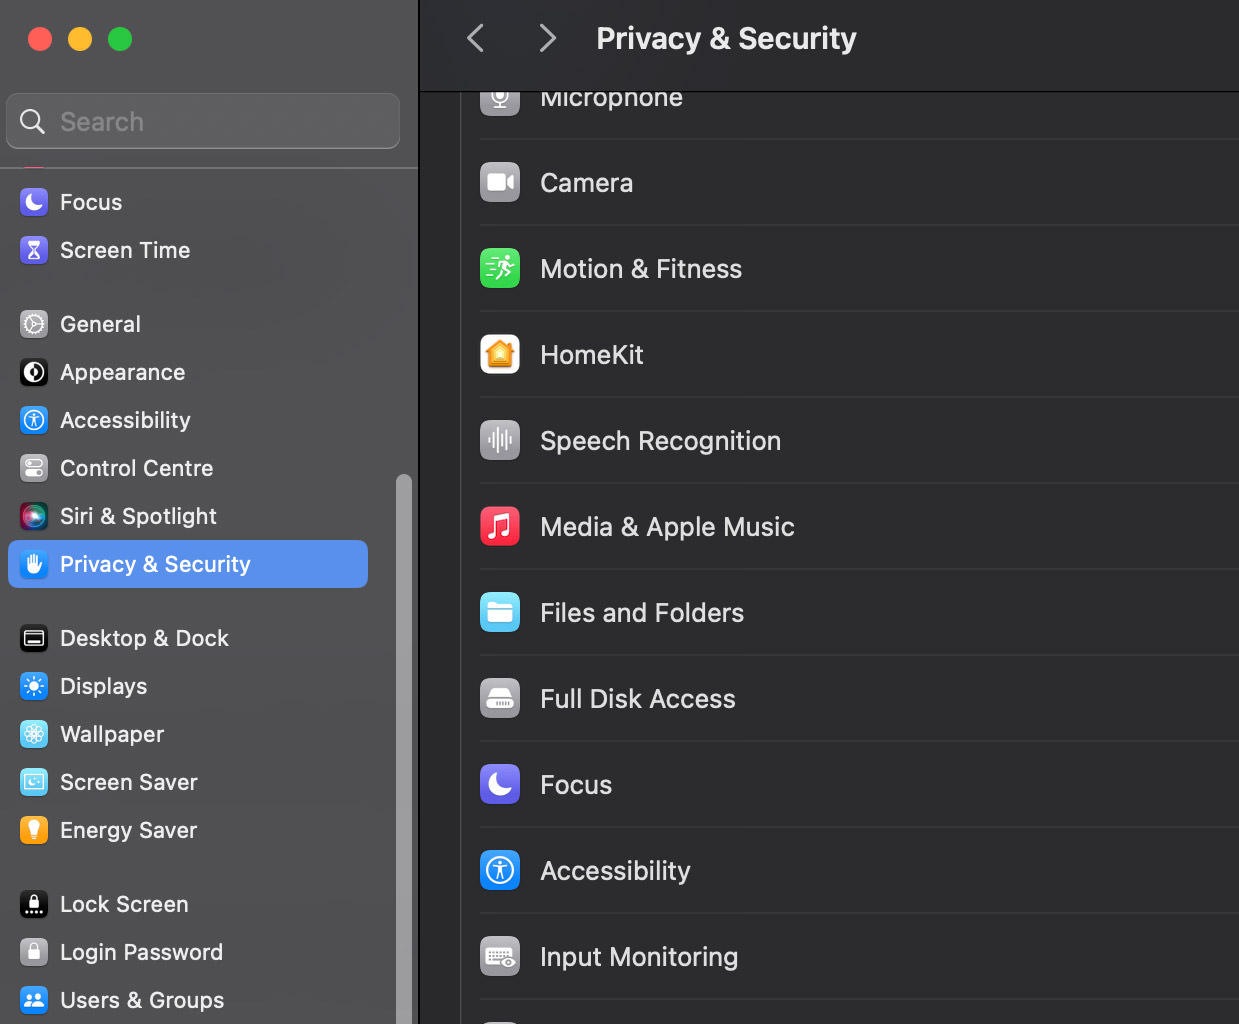
Since the app performs automated keystrokes on your Mac, macOS will block it by default. To ensure it works correctly, you’ll need to grant the app the necessary permissions.
Open System Settings and navigate to Privacy & Security > Accessibility. Enable the app, or click the “+” button at the bottom to add it if it’s not already listed.
AppleScript Key Code Reference
| Key | Key Code | Key | Key Code |
|---|---|---|---|
| A | 0 | B | 11 |
| C | 8 | D | 2 |
| E | 14 | F | 3 |
| G | 5 | H | 4 |
| I | 34 | J | 38 |
| K | 40 | L | 37 |
| M | 46 | N | 45 |
| O | 31 | P | 35 |
| Q | 12 | R | 15 |
| S | 1 | T | 17 |
| U | 32 | V | 9 |
| W | 13 | X | 7 |
| Y | 16 | Z | 6 |
| 1 | 18 | 2 | 19 |
| 3 | 20 | 4 | 21 |
| 5 | 23 | 6 | 22 |
| 7 | 26 | 8 | 28 |
| 9 | 25 | 0 | 29 |
| Equal (=) | 24 | Minus (-) | 27 |
| Right Bracket (]) | 30 | Left Bracket ([) | 33 |
| Quote (‘) | 39 | Semicolon (;) | 41 |
| Comma (,) | 43 | Period (.) | 47 |
| Slash (/) | 44 | Backslash (\) | 42 |
| Tab | 48 | Space | 49 |
| Return (Enter) | 36 | Escape (Esc) | 53 |
| Delete | 51 | Forward Delete | 117 |
| Home | 115 | End | 119 |
| Page Up | 116 | Page Down | 121 |
| Left Arrow | 123 | Right Arrow | 124 |
| Down Arrow | 125 | Up Arrow | 126 |