How to Fix Pixelated Graphics in Photoshop
Do you have a low-resolution graphic that’s extremely blurry or pixelated, and you want to sharpen it?
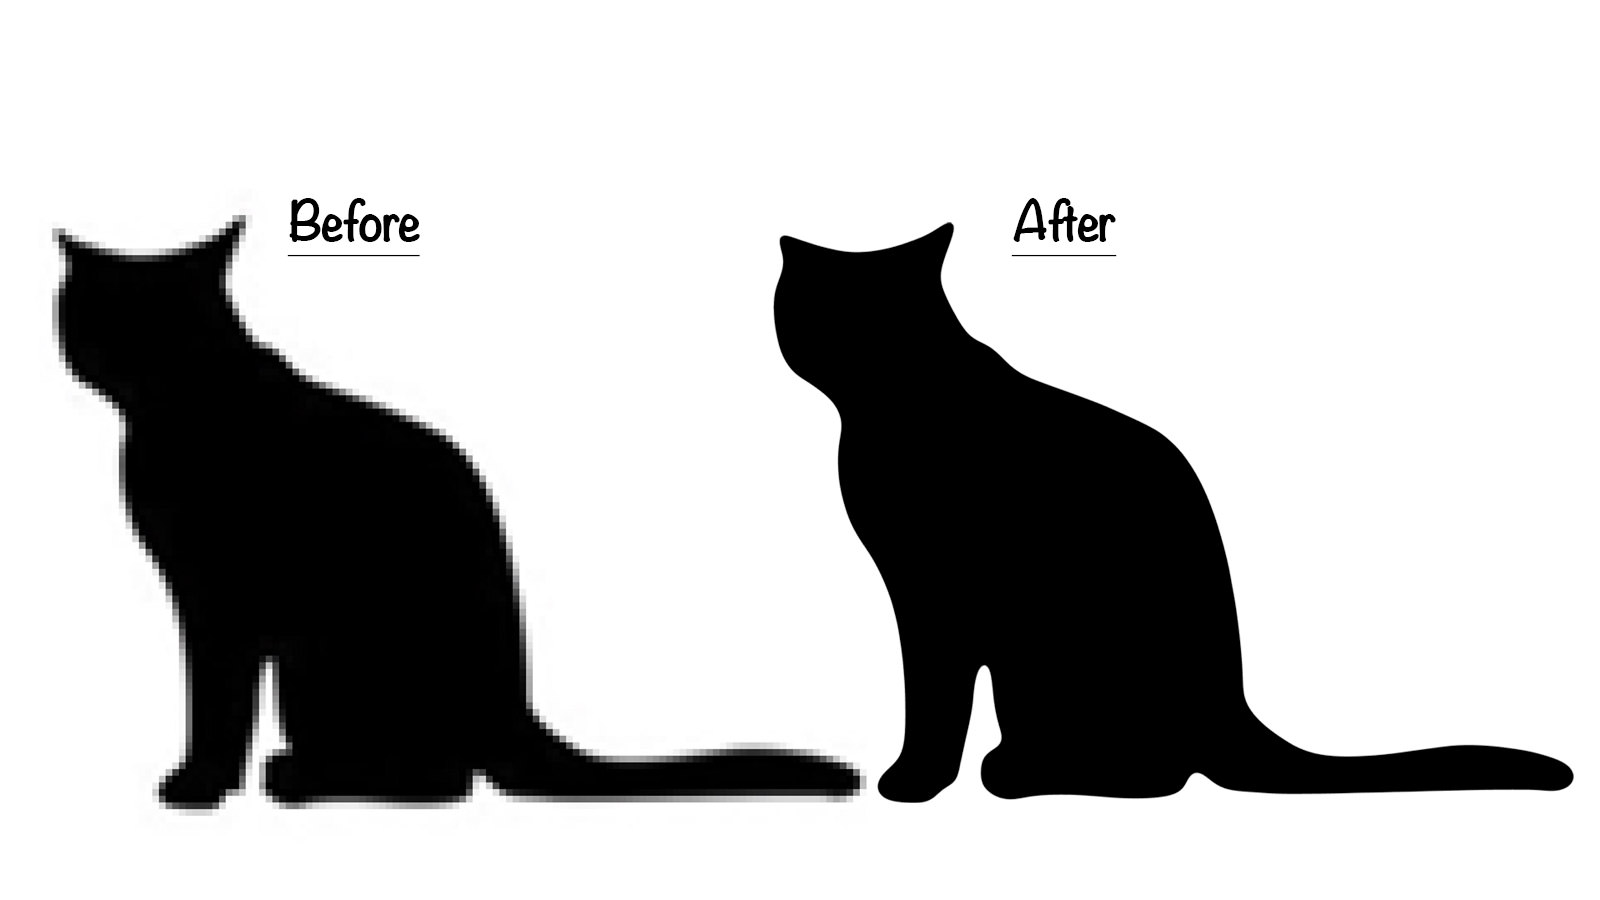
Well, there’s a straightforward Photoshop technique for image sharpening that can help you transform a blurry and pixelated image into something sharper.
Step 1.
First, open your image in Photoshop, then navigate to Filter > Blur > Gaussian Blur.
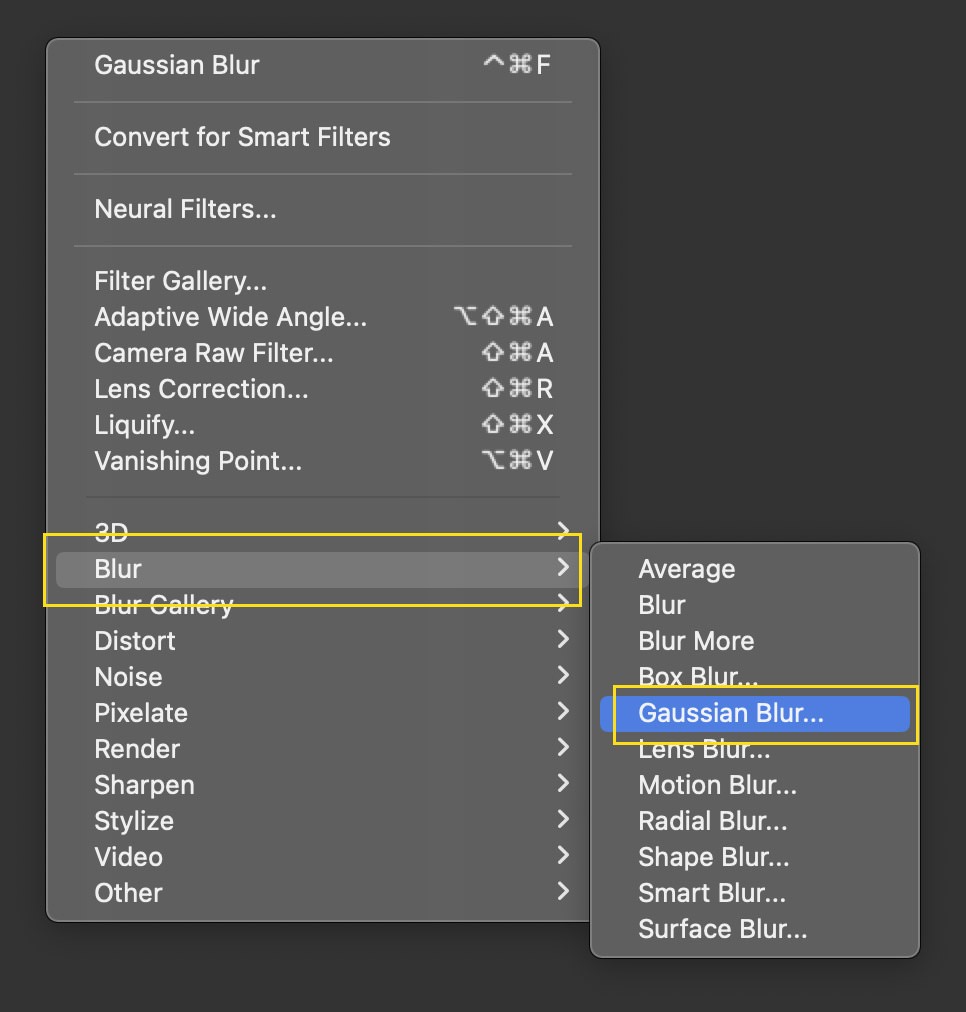
Step 2.
Apply some Gaussian Blur to the image, like this:

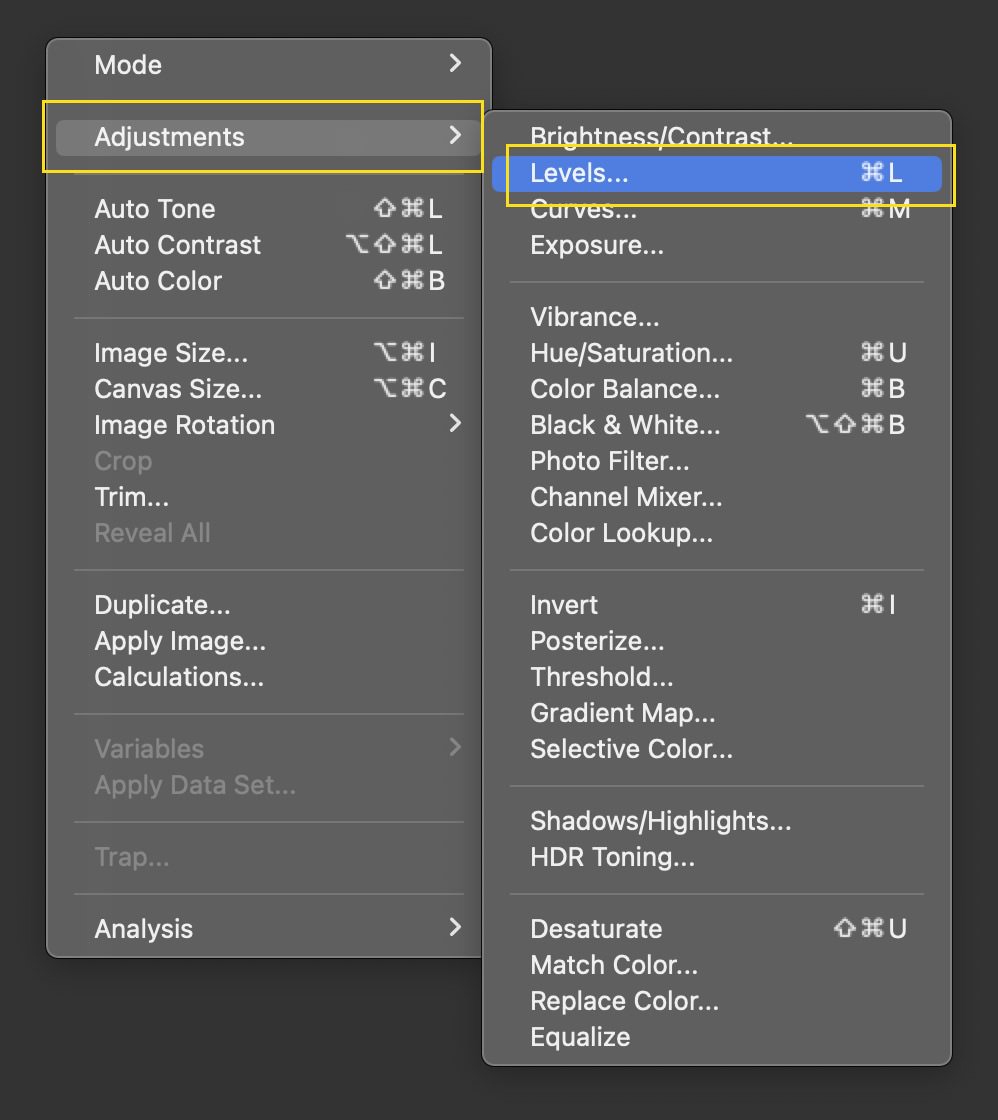
Step 3.
Next, go to Image > Adjustments > Levels.
Step 4.
In the Levels dialog box, slide both the left and right markers towards the center.
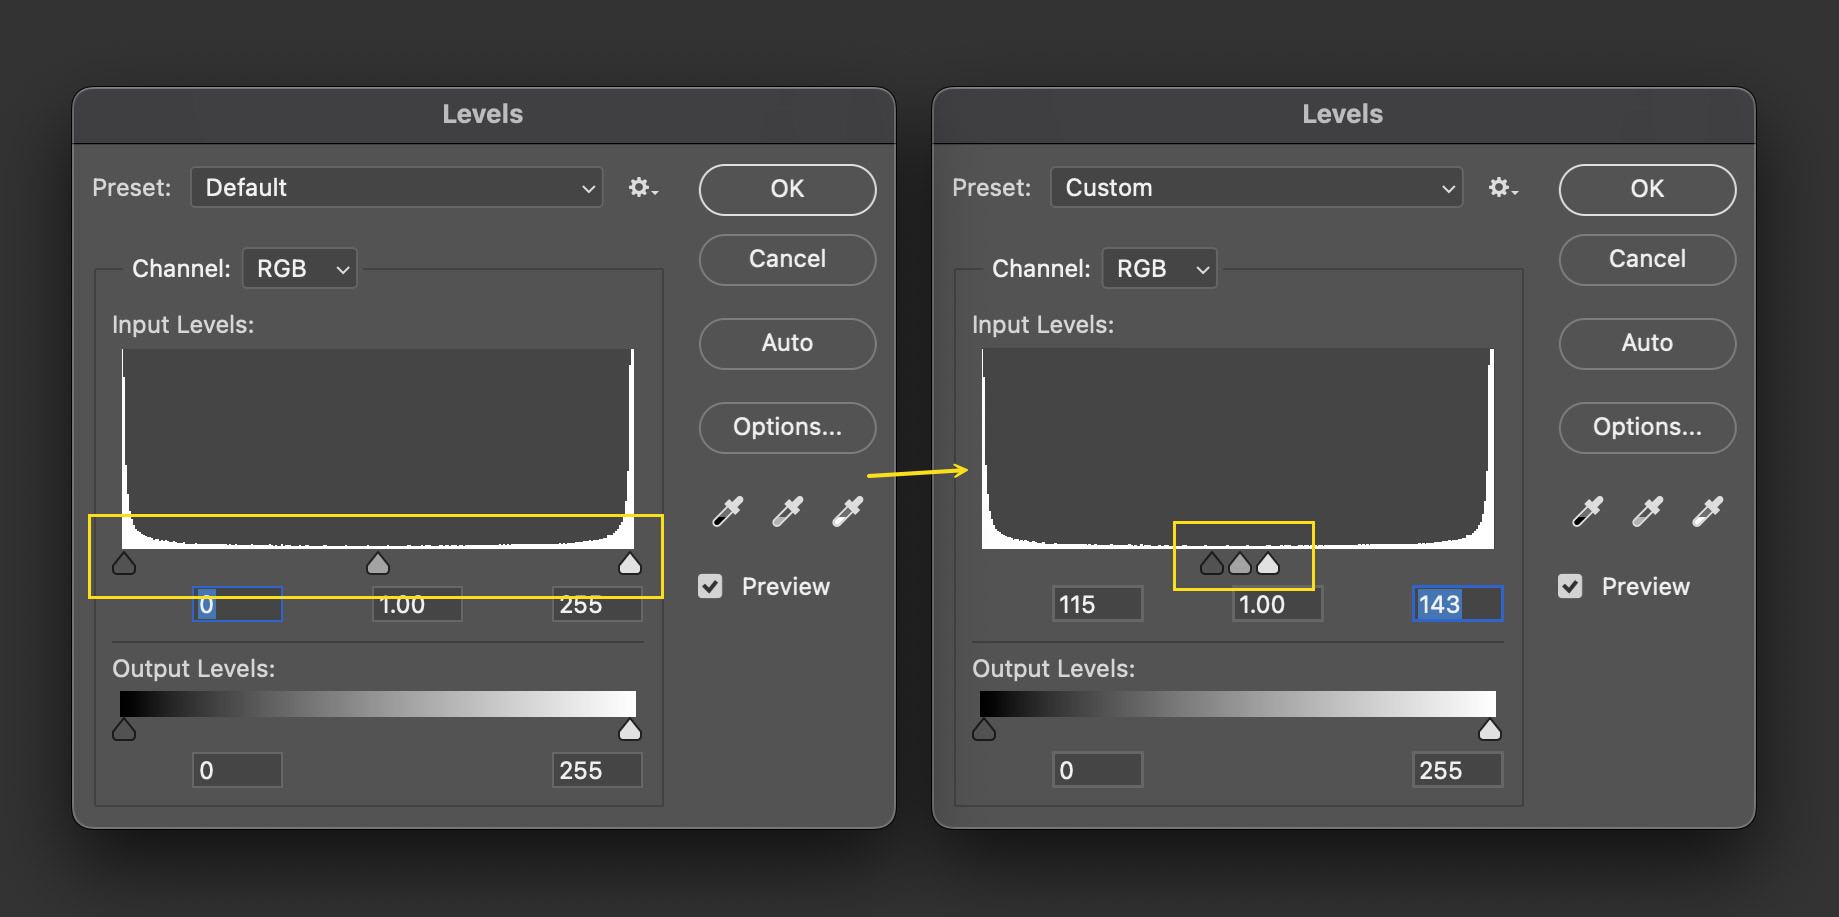
Step 5.
As you move them, you’ll notice the image gradually becomes sharper.
Do note that this method is most effective with two-tone graphics where there’s a clear color distinction between the object and the background.